|
Videos and helpful resourcesLisa has lots of tips for checking your ¼" seam and I've included some instructions below.
|
It's starting to grow
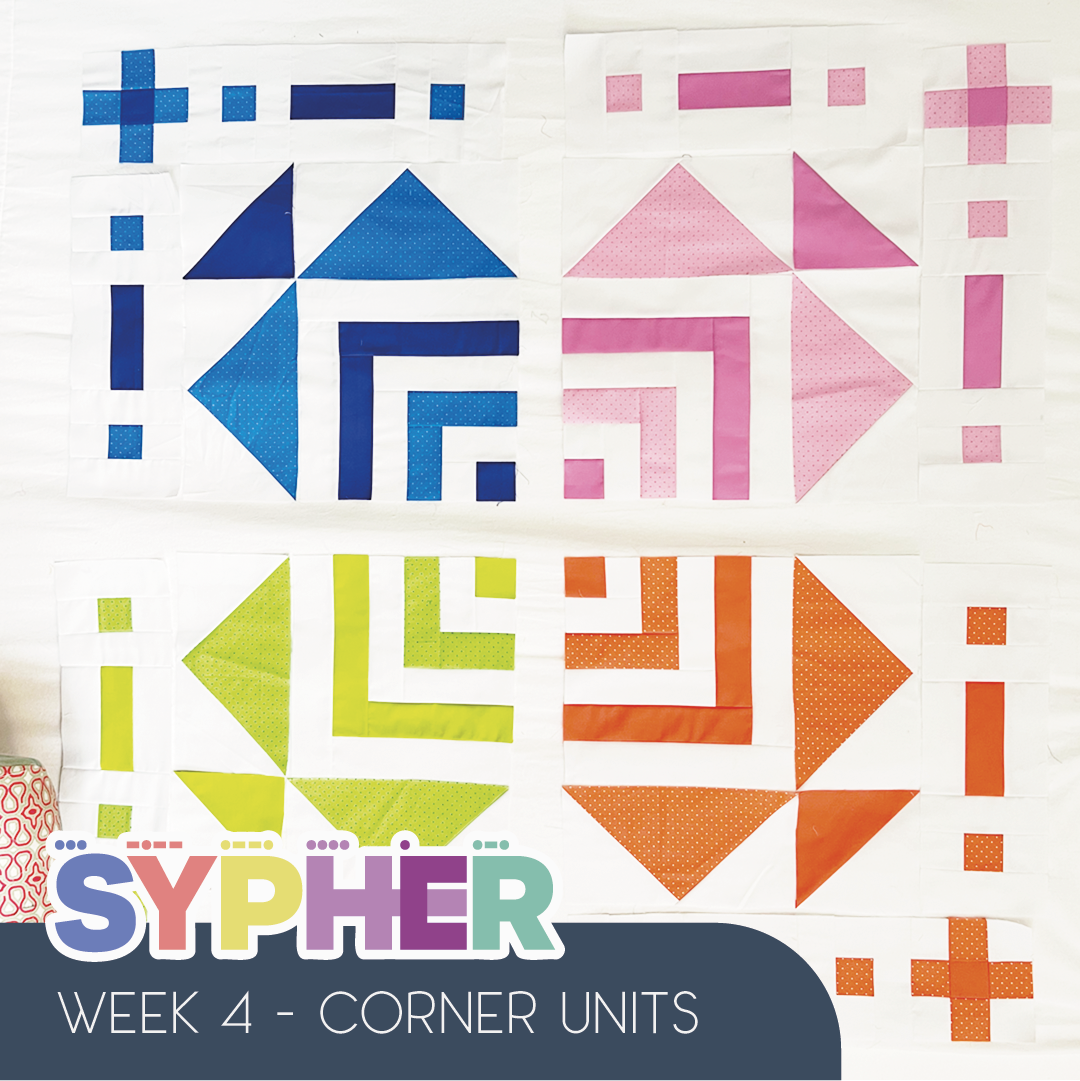
This week the quilt top will really start to grow. We're making the large corner blocks which make up a large portion of the quilt, so you'll get a great idea of how the finished quilt will look.
This week the quilt top will really start to grow. We're making the large corner blocks which make up a large portion of the quilt, so you'll get a great idea of how the finished quilt will look.
Testing your ¼" seam
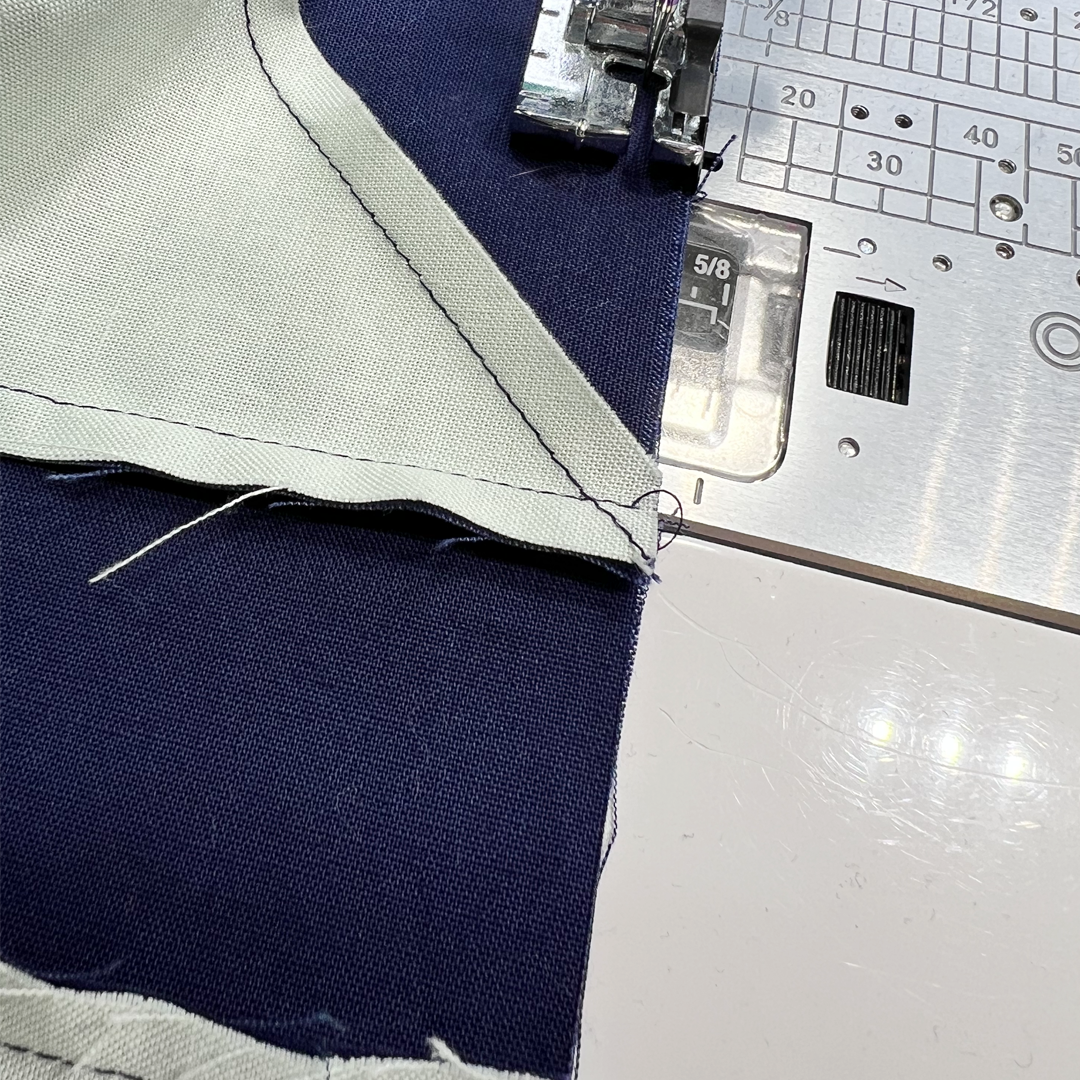
It's worth getting it right before you start. Cut yourself two (x2) 2 ¼" wide x 3" tall pieces of fabric from your scrap pile. Sew them together along the long edge and then gently press the seams open. The piece should now measure exactly 4" wide x 3" tall. If its larger your seam is too narrow, if it's smaller you seam is too wide.
If your machine allows it you can move your needle over a little, or if not use a seam guide to mark where to place the fabric (I do both). Some machines come with these or you can purchase magnetic ones that attach to the side. If none of those are a good solution for you then a good piece of wash tape marking where to line up your fabric is a great solution.
|
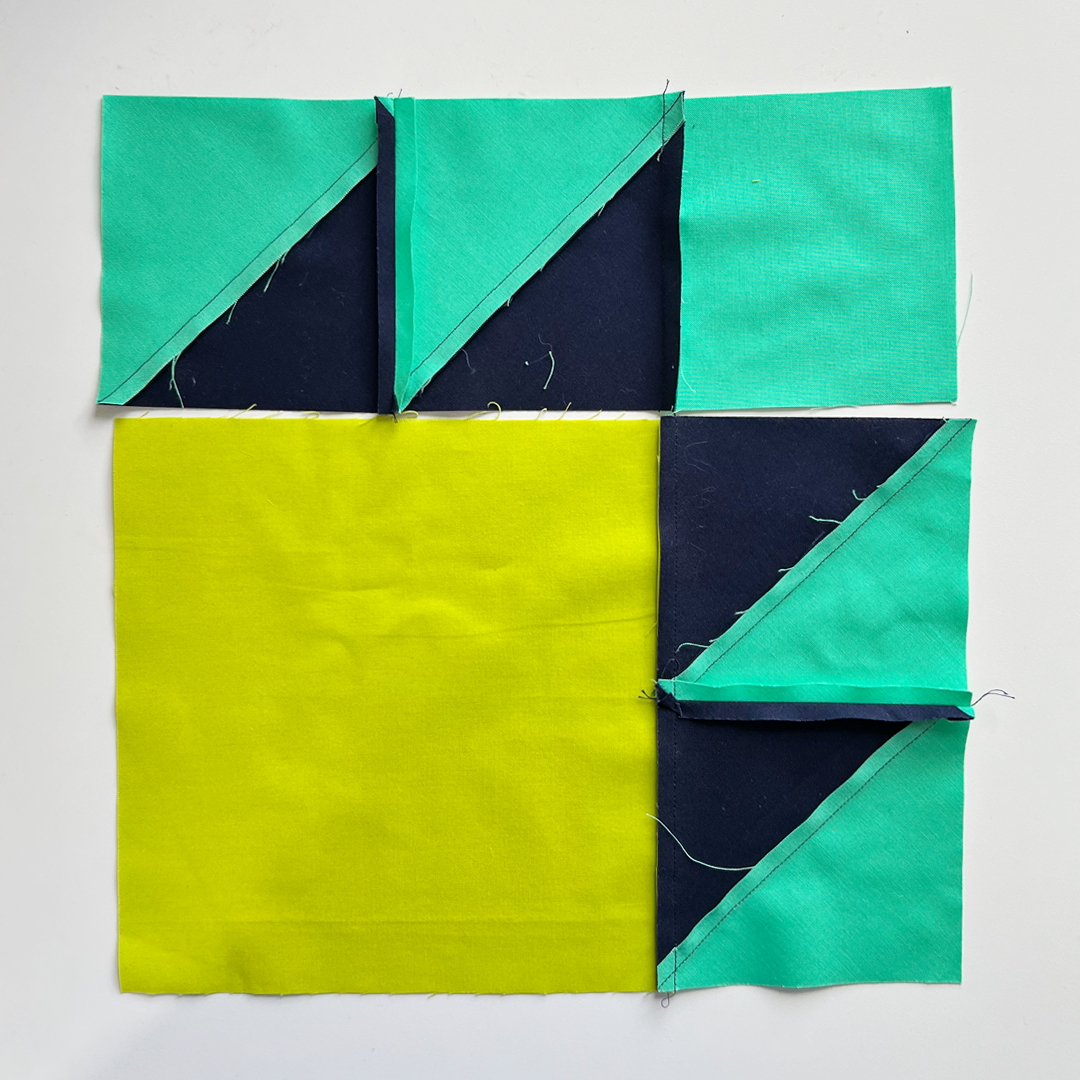
Cabin Block Corners
Cabin blocks are a lovely simple block to sew together. We're not sewing a full cabin block this time, but the principles are the same. Starting with a square, strips are sewn to the top and the right hand sides in rounds, changing the colours for each round. My top tip is to pin the longer strips. As the strips get longer they are more prone to be stretched, a pin at the start, middle and end will prevent this. |
|
Corner Blocks
This is the point where all of the work over the last few weeks pays off, quickly! Once you've got your cabin blocks made you can start adding the Flying Geese, HSTs, Dots & Dashes and striped units. Once these are sewn in you'll have four large corner blocks, which could almost be a quilt by itself. Resist the temptation to sew the four corners together and call it a quilt and then next week we'll add in the arrows blocks and centre squares. |
Remember to post your photos using the #SypherSAL and tag me @paulasteel.quilts and Lisa @modernquiltclub so we can share in your achievements and spread the encouragement.
Good luck with the block making :) And check back next week for week 5!
Good luck with the block making :) And check back next week for week 5!