Block Making and Top Construction
|
OK so hopefully you have everything cut out and your strips made up, so lets get to the block making.
Before we start just a little info on matching seams. This quilt top uses the nestling seams method, which is definitely easier for a beginner. Alternatively you can press all of your seams flat, but they will be slightly trickier to match up, if you are a beginner. In order to nestle the seams, we need to do some extra preparation in the pressing phase, it takes a bit longer but you will save the time later on. |
So what do I mean by nestling seams?
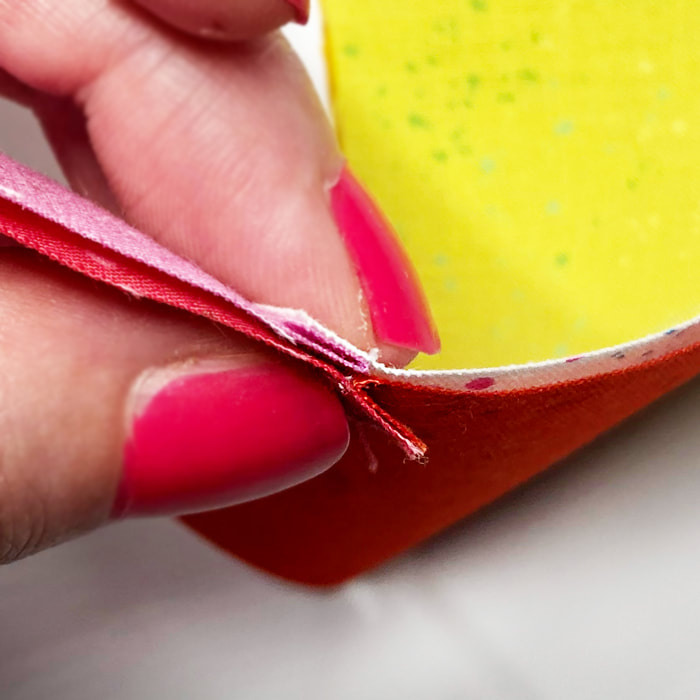
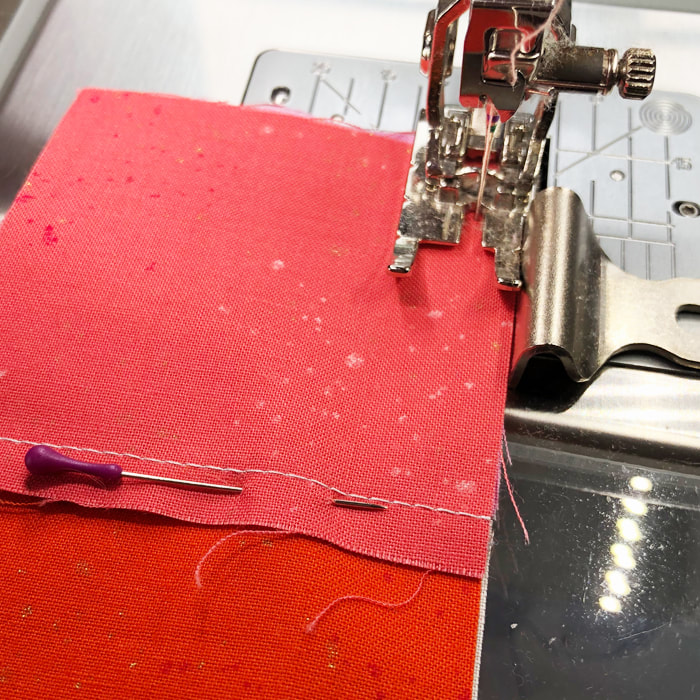
Nestling seams happens when the two pieces you are joining have seams that are pressed in the opposite direction. This means that they (kind of) click together when you are matching them up.
Nestling seams happens when the two pieces you are joining have seams that are pressed in the opposite direction. This means that they (kind of) click together when you are matching them up.
Making the Blocks
Rainbow Blocks
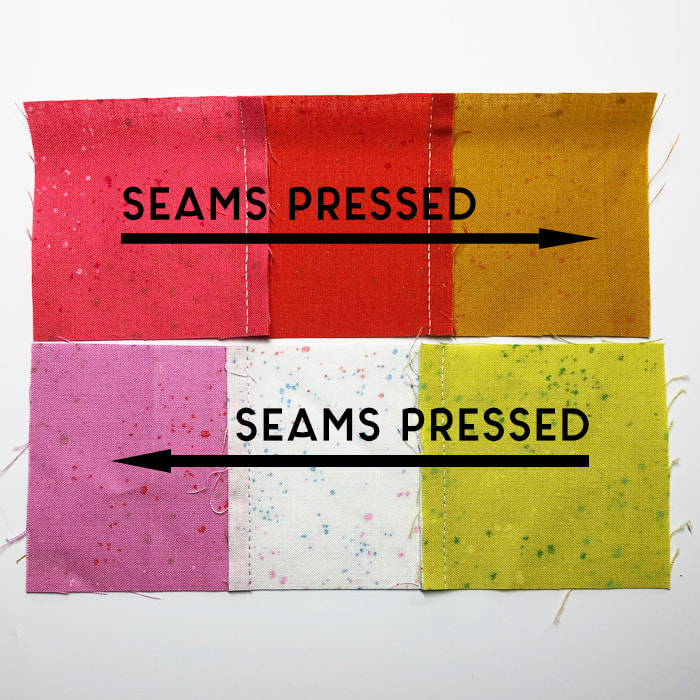
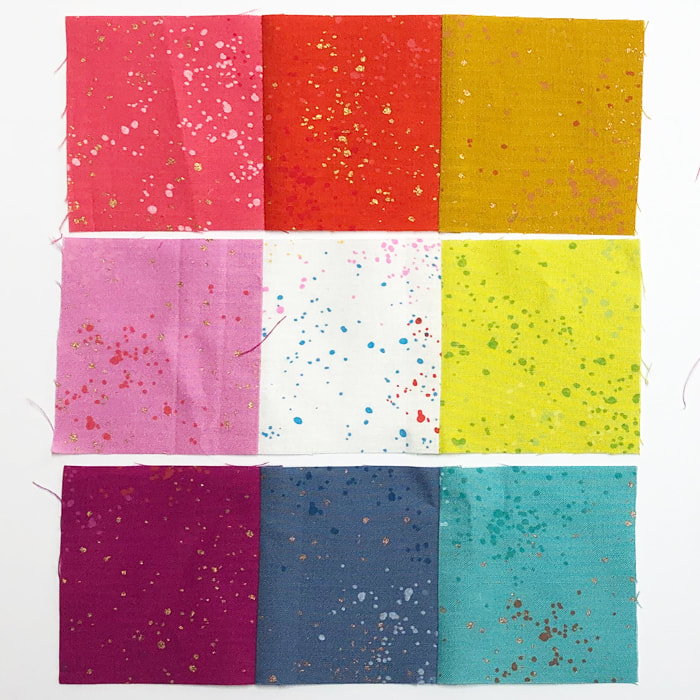
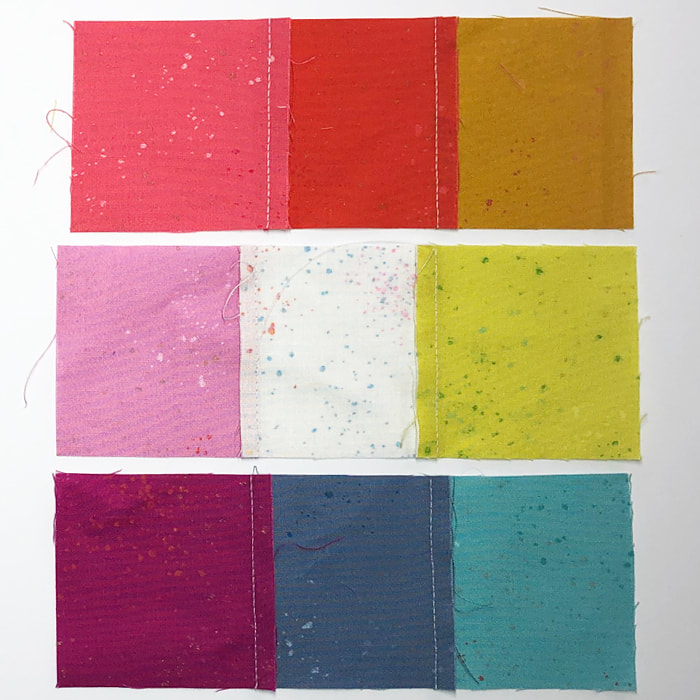
STEP 1 - Take the three strips that make up the full rainbow and set them out as in fig 1, making sure the seams for the middle row are going in the opposite direction to the top and bottom rows. (fig 2)
STEP 2 - Place the first and second rows right sides together (RST) and match (nestle) up the seams and pin in place. Sew together with a ¼" seam. (Fig 3).
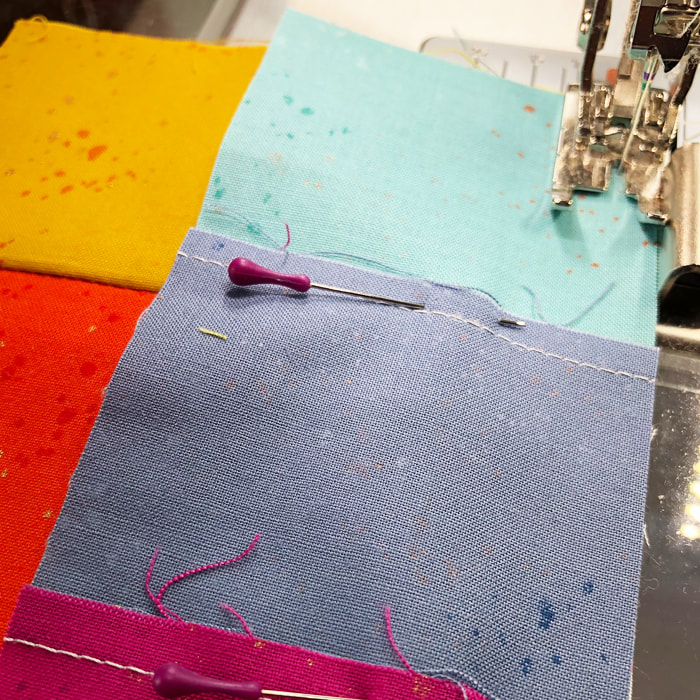
STEP 3 - Open up and then place the third row RST with the second row, match up the seams and sew together with a ¼" seam. (fig 4)
STEP 4 - Once finished press all of the horizontal seams up towards the top (red end). Repeat so that you have 13 Rainbow Blocks in total.
Cross Blocks
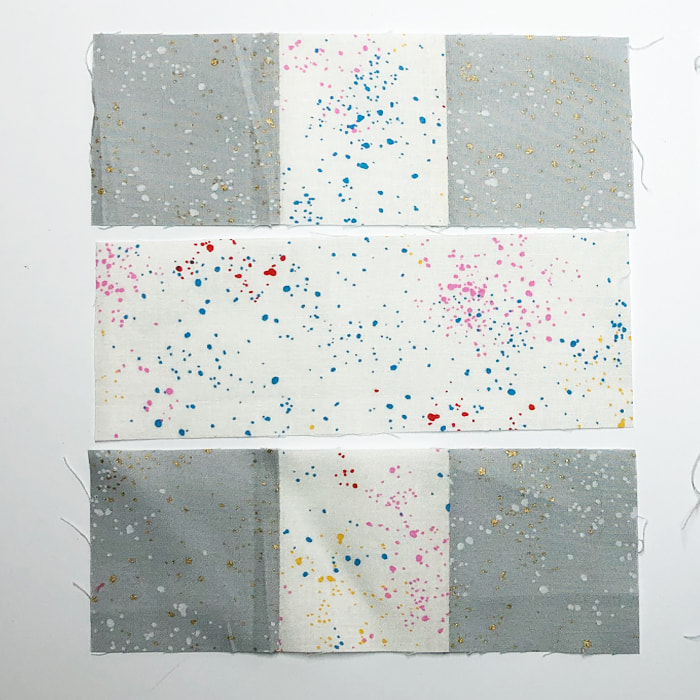
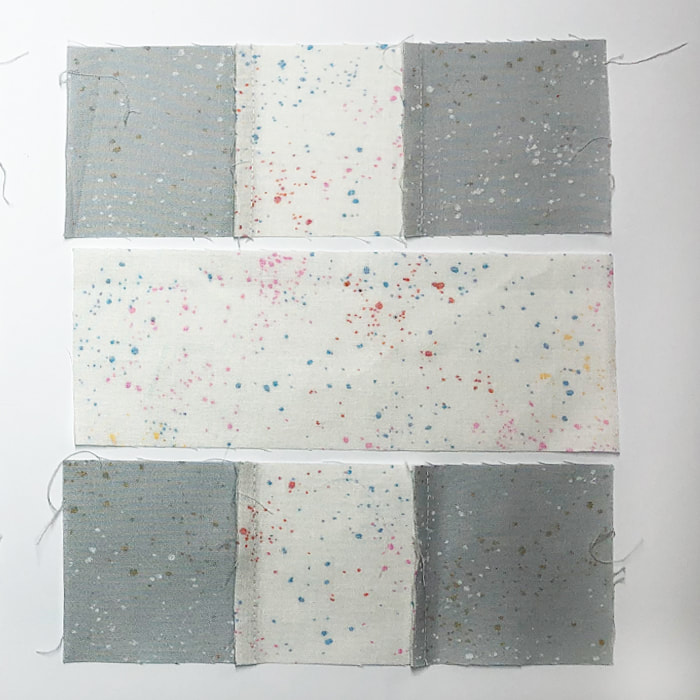
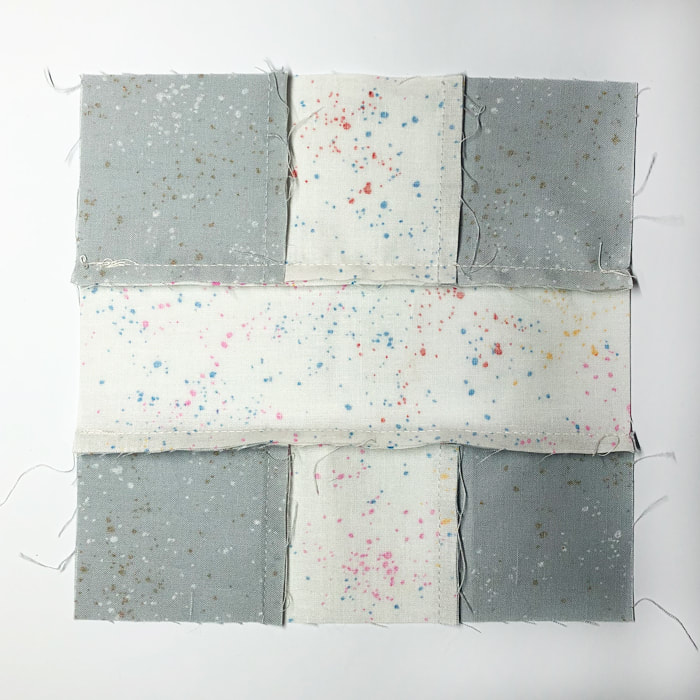
STEP 5 - Take the three strips that make up the cross block and set them out as in fig 5, making sure the seams for the top and bottom rows go in the same direction (fig 6)
STEP 6 - Place the first and second rows right sides together (RST). Sew together with a ¼" seam.
STEP 7 - Open up and then place the third row RST with the second row and sew together with a ¼" seam.
STEP 8 - Once finished press all of the horizontal seams down towards the bottom (fig 6). Repeat to make 4 cross blocks.
T-Blocks A & B
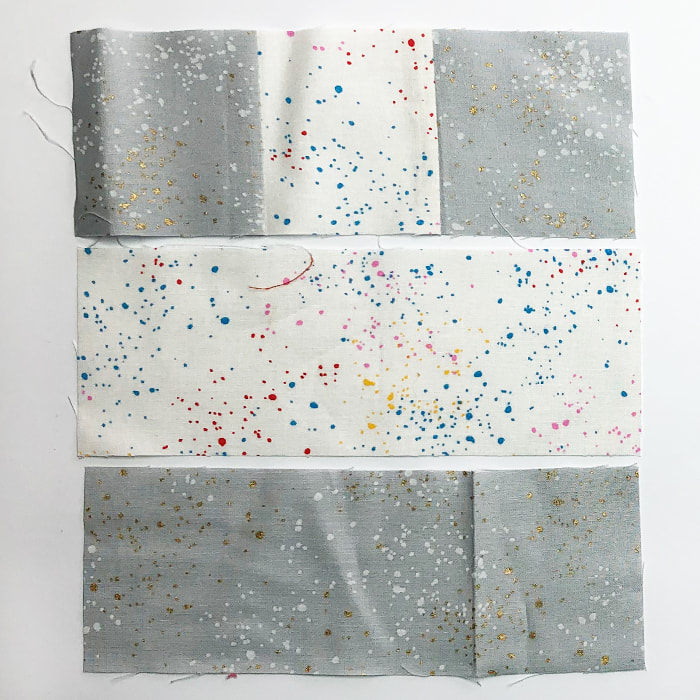
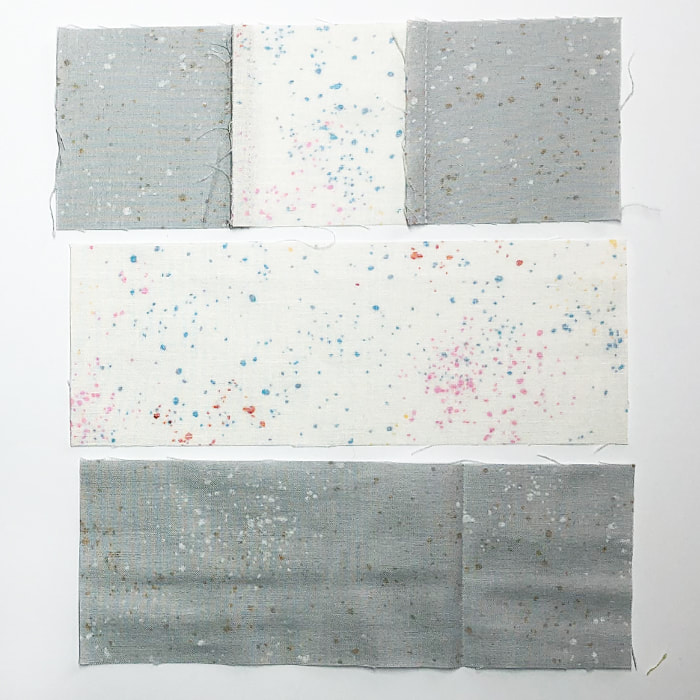
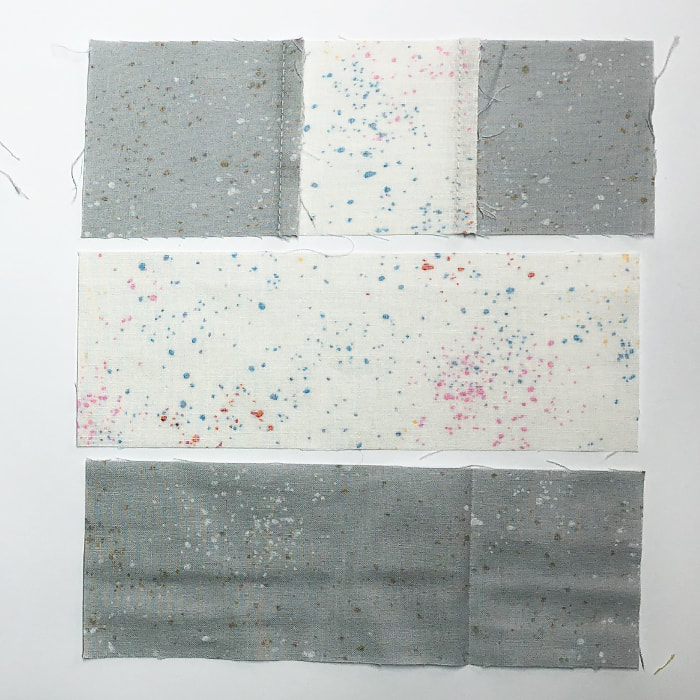
STEP 9 - Take the three strips that make up the T block and set them out as in fig 8, making sure the seams for the top row go towards the right, which will be the left on the back (fig 9)
STEP 10 - Place the first and second rows right sides together (RST). Sew together with a ¼" seam. Open up and then place the third row RST with the second row and sew together with a ¼" seam.
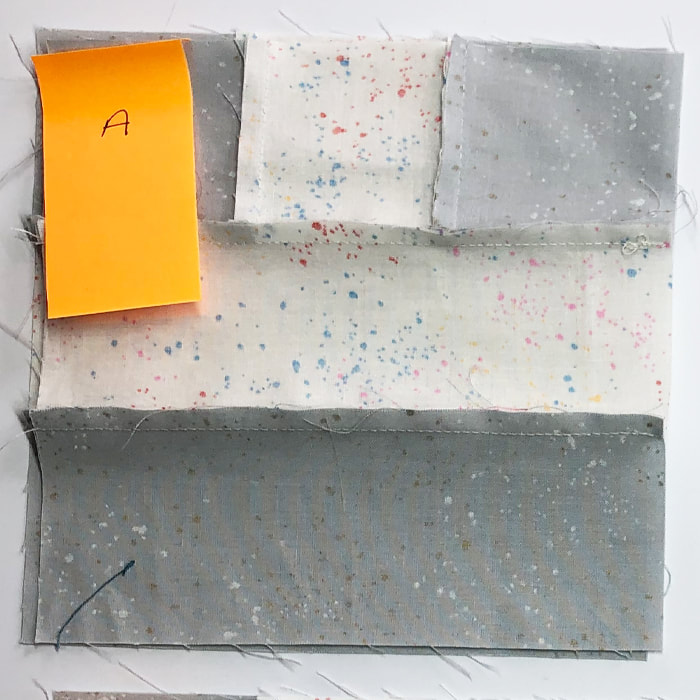
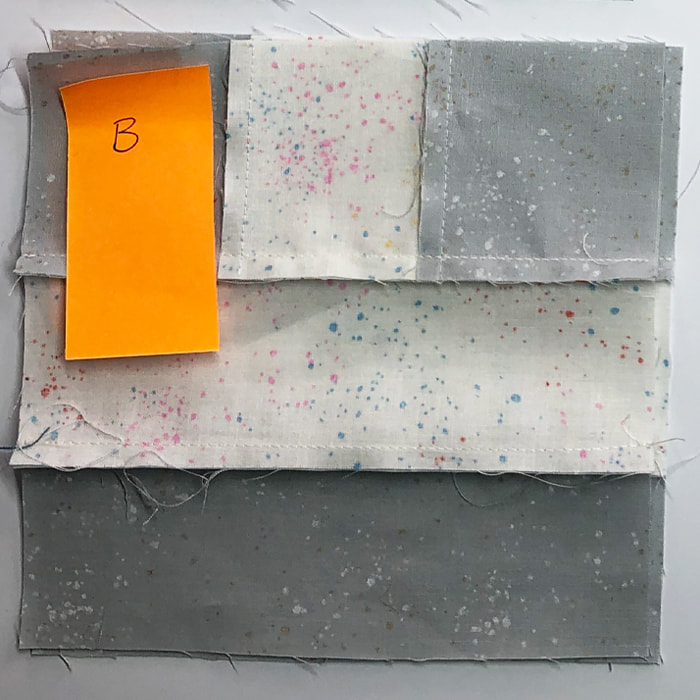
STEP 11 - Repeat to make a total of 4 T-blocks. For two of the blocks press the horizontal seams up and label them A (fig 10), for the other two press the seams down and label them B (fig 11)
T-Blocks C & D
STEP 12 - Take the three strips that make up the T -block and set them out as in fig 12, making sure the seams for the top row go towards the left, which will be the right on the back (fig 13)
STEP 13 - Place the first and second rows right sides together (RST). Sew together with a ¼" seam. Open up and then place the third row RST with the second row and sew together with a ¼" seam.
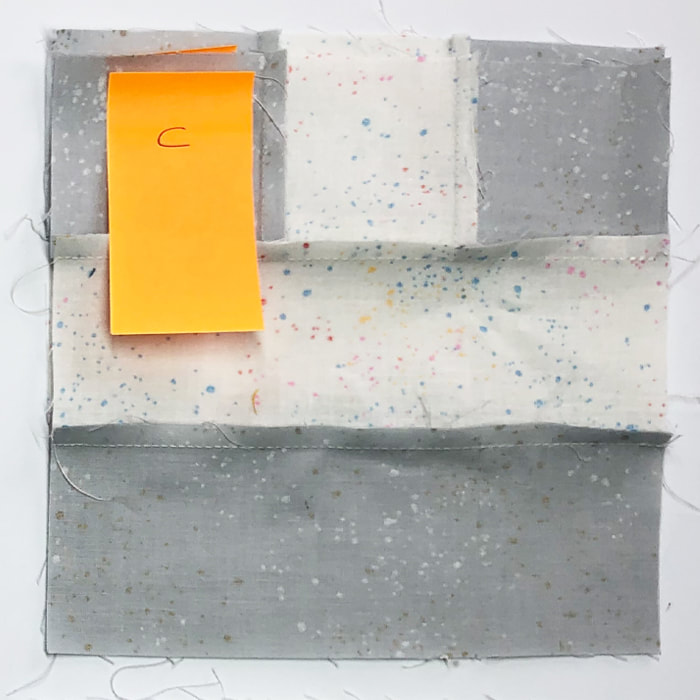
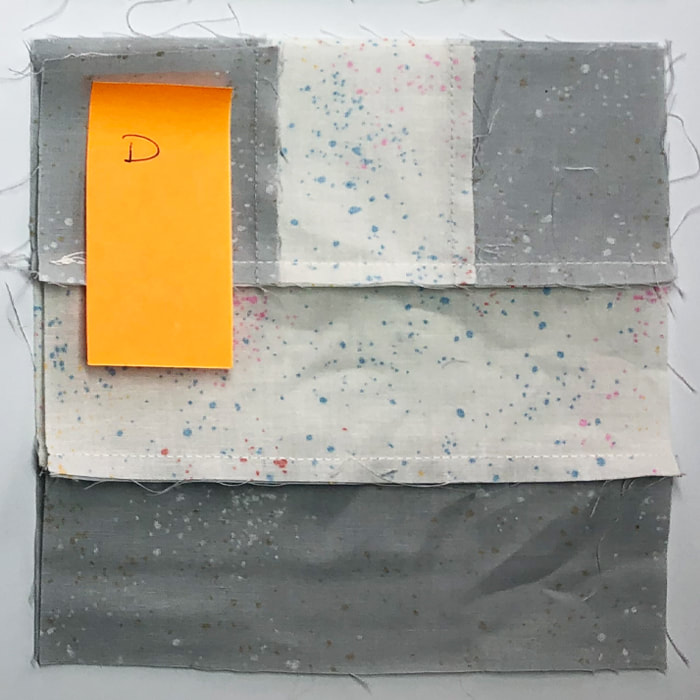
STEP 14 - Repeat to make a total of 4 T-blocks. For two of the blocks press the horizontal seams up and label them C (fig 10), for the other two press the seams down and label them D (fig 11)
Constructing the Top
Congratulations all of your blocks are made and the hard pressing work has been done, which means it will be a breeze to pop the top together.
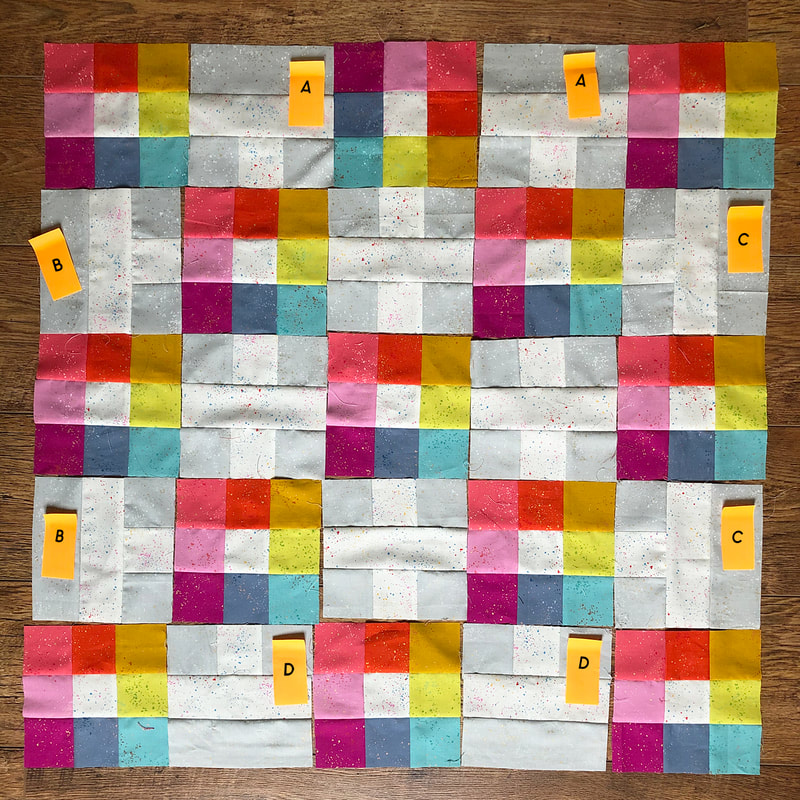
STEP 15 - Lay out the blocks on a flat surface (like the floor), paying close attention to the placement of T-Blocks A, B, C & D and the Cross blocks.
STEP 16 - Collect the blocks up in rows and label each row so you know how they go back together.
STEP 17 - Starting with row 1, place blocks 1 & 2 RST and match up (nestle) the seams. Sew together with a ¼" seam. Repeat for each of the remaining blocks in Row 1.
STEP 18 - Repeat for each of the rows so that you have 5 rows of 5 blocks. Press the joining seams of Rows 1, 3 & 5 to the left and rows 2 & 4 to the right.
STEP 19 - Place Row 1 & 2 RST and match up the seams and pin in place. Sew together with a ¼" seam and then open out. Continue adding the rows until all 5 are sewn together.
STEP 20 - Give the top a good press and then sew a 3½" x 30½" border piece to the top and bottom.
STEP 21 - Finish the top by adding the 3½" x 36½" border strips to the right and left hand side.

